CSV files are a common source of data for reporting purposes, and are usually delivered as email attachments or appearing in SharePoint, etc. Power Automate can be used to move the CSV file to an Azure Blob Storage and Azure SQL database can be connected to the Blob Storage to fetch the data from the CSV-file. Simple 🙂
How to do it?
- Create Azure Storage Account & Container
- Get Access Key for authentication on Storage Account level
- Build your flow, create a blob connection for the CSV file
- Create Shared Access Token for DB connection
- Configure the database based on the following steps:
STEPS 1-4 YOU NEED TO DO ONLY ONCE
STEP 1: FIRST CREATE A SHARED ACCESS SIGNATURE, FOR EXAMPLE WITH AZURE STORAGE EXPLORER
STEP 2: CREATE MASTER KEY (THIS KEY IS USED IN ENCRYPTING THE DB SCOPED CREDENTIALS)
CREATE MASTER KEY ENCRYPTION BY PASSWORD=’LasseDemoPassword’;
you can verify its existence with:
SELECT * FROM sys.symmetric_keys;
STEP 3: STORE THE SHARED ACCESS SIGNATURE AS A CREDENTIAL IN THE DB
CREATE DATABASE SCOPED CREDENTIAL AzureBlob
WITH IDENTITY = ‘SHARED ACCESS SIGNATURE’,
SECRET = ‘sv=2021-1bM60%3D************************************’;
— REMEMBER NO ? MARK!
STEP 4: CREATE AN EXTERNAL DATA SOURCE CONNECTION
CREATE EXTERNAL DATA SOURCE AzureBlobDS
WITH
(
TYPE = BLOB_STORAGE,
LOCATION = ‘https://lassesdemosaaaa.blob.core.windows.net/csv’,
CREDENTIAL = [AzureBlob]
);
STEP 5: TEST THAT YOU CAN READ THE FILE
SELECT * FROM OPENROWSET(
BULK ‘accounts.csv’,
DATA_SOURCE = ‘AzureBlobDS’,
SINGLE_CLOB
) AS CSVFILE;
STEP 6: FINALIZE THE IMPORT STATEMENT
BULK INSERT account
FROM ‘accounts.csv’
WITH
(
DATA_SOURCE = ‘AzureBlobDS’, –datasource name configured in step 4
FORMAT = ‘CSV’,
FIELDTERMINATOR = ‘,’, –usually , or ;
CODEPAGE = ‘65001’, –usually 1252 or 65001
ROWTERMINATOR = ‘0x0a’, — 0x0a or \n
BATCHSIZE=100000, –for faster processing
FIRSTROW=2 –csv file contains column headers, no need to import those
);
STEP 7: Verify data that encoding works correctly, and change the codepage if not
select * from account
STEP 8: COPY THE STATEMENT FROM STEP 6 TO POWER AUTOMATE
STEP 9: TEST AND VERIFY
select * from account
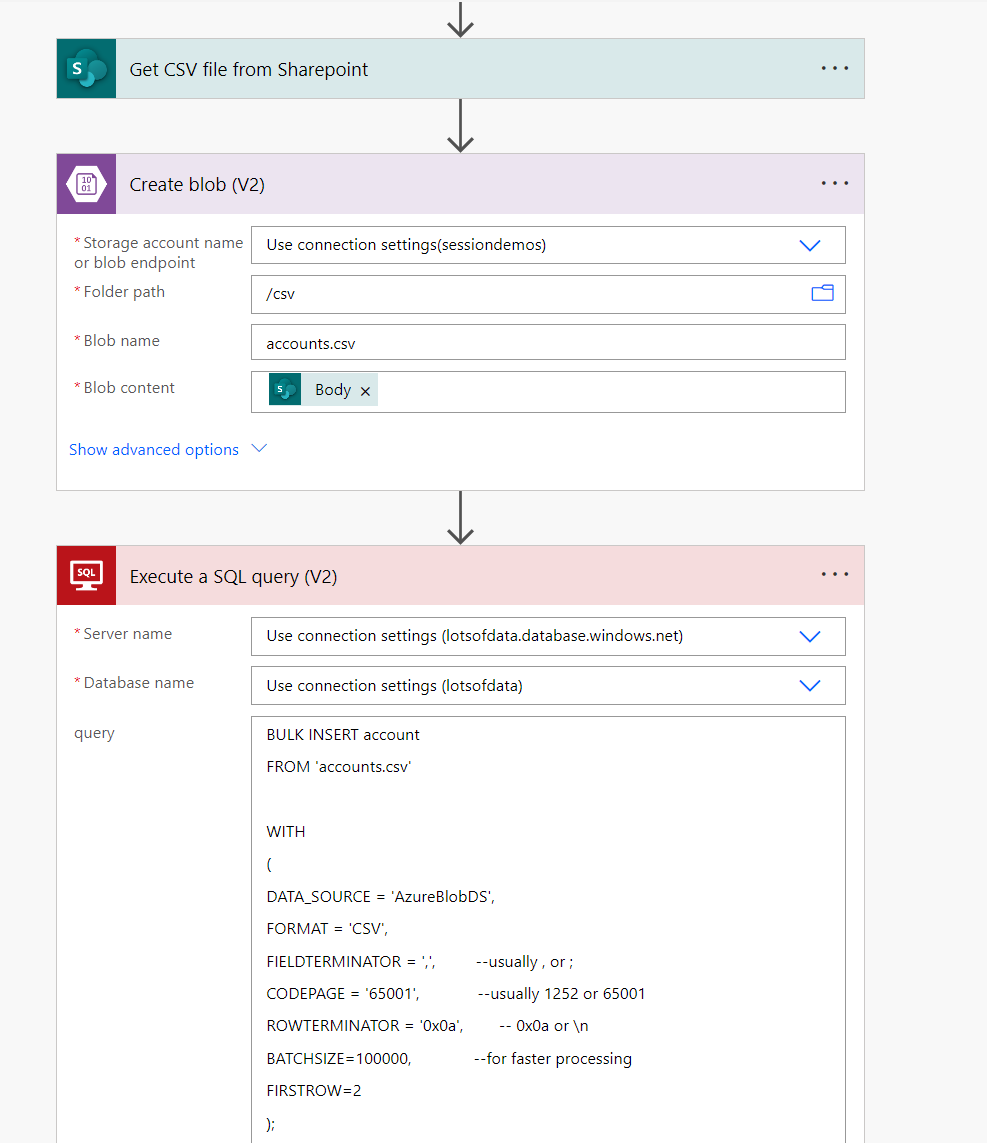
And here’s how the Power Automate flow looks like after you have configured the blob connection.